The keys to facilitating a great live session
By Chelsea Wilson
Instructor Support
Summary
Tips and tricks from the Maven team to help you successfully host a live cohort session in Zoom
The #1 differentiator between a good course and a great course are how successfully you host live sessions for your cohort. Students crave connection with you and their peers, and the live sessions are the best way to facilitate this. One aspect of running a great live session is to have flawless execution of the logistics. Most instructors on Maven host their live sessions in Zoom; read on for a step-by-step guide to getting set up and hosting your sessions on Zoom.
30 minutes before
- Join the room early and pause the recording.
- Maven will automatically share the recording to your students' via the course Home if you stop the recording, but not if you pause it.
- Ensure your waiting room is turned on in Zoom.
- Briefly review your session content.
- Gather any relevant links to share in the Zoom chat or via your course community. You might have links for:
- external content, syllabus items, session surveys, etc.
- Queue up your post-workshop announcement as a DRAFT in the #announcement channel.
- Publish as soon as the workshop is over.
10 minutes before
- Select a song to share and queue it up via Zoom audio.
- Have a no-fail/icebreaker question ready for the first few minutes of the session.
- Make any other staff co-hosts.
- Have your needed windows open: presentation, notes, Zoom, etc.
- Silence computer notifications if needed.
Class start
- Once the instructor is ready, click “Admit All” attendees.
- Be ready to admit students individually if they join later.
- At the 3-4 minute mark, start sharing your session content.
During workshop
- Keep an eye on the participant list for latecomers.
- Implement in-session engagement strategies to keep students involved.
- Keep a sense of time and adjust your content as needed.
- Queue up upcoming breakout rooms (see next section).
Breakout discussion
Below, Maven's written you a helpful step-by-step guide for using Breakout sessions in Zoom during your cohort. If you prefer to watch these steps in action, check out this video tutorial by Zoom.
- At least 5 minutes before the breakout discussion is set to start, click on the “Breakout Rooms” button in the Zoom footer:

You’ll see a screen that looks like this:
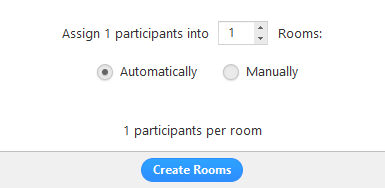
- Change the number of rooms setting until you see the desired number of participants per room.
- Click “Create Rooms” to queue up the rooms when you’re ready to split people up
- On this screen, you can make manual adjustments like switching people into different rooms or manually assigning someone to join a breakout room.
- Be ready to share links or simple directions in the Zoom chat.
- Give an opportunity for students to ask questions before you open the breakout rooms.
- Select “Open All Rooms” when you are ready to have people join the breakout rooms.
- People will be able to select “Join” to leave the main room and join their breakout rooms.
- If needed, you can manually assign students to a different room.
- People may get kicked off and rejoin the main room. They should be able to re-join their breakout room or you can re-assign them.
- Pause the recording during breakout rooms.
- Keep in mind that the main room is recorded unless you pause the recording.
- A minute or two before you close the room, you can send a “Broadcast Message" to help students wrap up their convos.
- When time is up, restart recording, click on “Close all Rooms”. This will start a 60 second countdown after which everyone will be forced back in the main room.
Last 10 minutes of workshop
- Ask a debrief question.
- Post your post-workshop announcement in the #announcement channel of course course community.
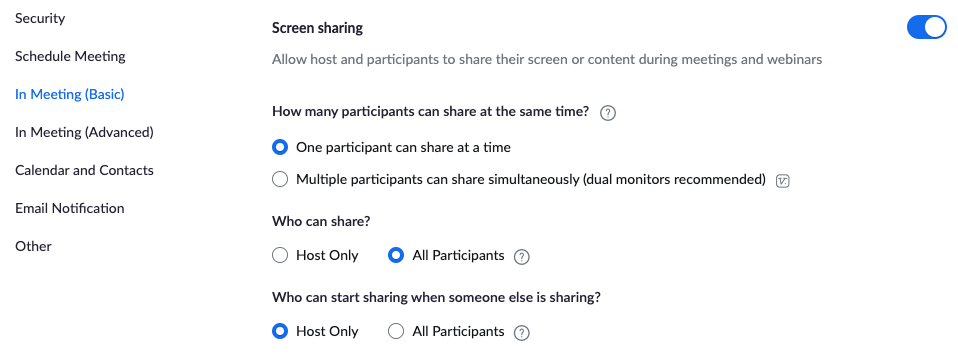
Helpful Zoom Settings
Screen sharing
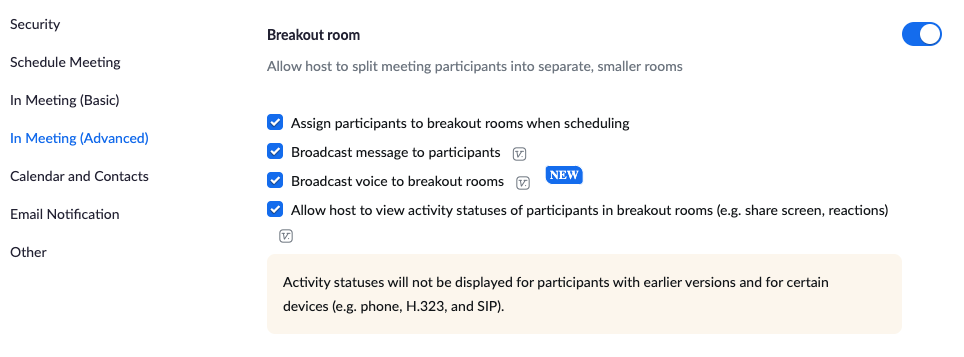
Breakout rooms
Related Courses

Create a system to keep documentation in use and updated
Make your documentation efforts repeatable and sustainable for scale
%20(9).png&w=1536&q=75)
Master the Craft of Group Facilitation
Transform stuck meetings into breakthrough moments, cultures of conflict into group belonging, and workplace ambiguity into strategic action
.jpg&w=1536&q=75)
Negotiation Playbook for Entrepreneurs and Tech Careers
Tactics, frameworks and lessons from a decade of coaching founders, PMs, engineers, and execs to get paid what they are worth.

The PM's Playbook to Revenue Growth
Turn product insights from real-world case studies—featuring Uber, Airtable, Meta, and many more—into measurable revenue gains in 3 weeks.